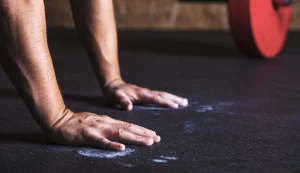
Rubber flooring has the advantage of being exceedingly durable and requires minimal maintenance. Because of its durable yet yielding structure, most liquids will not discolour or damage the surface, and it is generally difficult to damage the material with physical force. Rubber flooring is extremely resistant to burns and does not allow mould or mildew to grow. Dirt and debris settle gently on the surface of the rubber, making the floor simple to clean.
rubber tiles are used in a wide range of difficult environments, including kitchens, bathrooms, hospitals, playgrounds, and gyms. However, certain basic cleaning and maintenance measures must be performed regularly to maintain the floor disinfected and looking its best. If your rubber flooring was installed with adhesive, you should not clean it for at least 72 hours following installation to allow the adhesive to take hold. After three full days, the installation is complete and the floor can be treated normally.
Keep reading to find out what is the best way to take care of rubber flooring.
Here are the steps to take when attempting to clean your rubber flooring:
- Make a cleaning solution – 1 cup of white vinegar in a gallon of hot water makes an inexpensive and all-natural rubber floor cleaning solution. To clean and disinfect the floor, apply this solution with a mop, sponge, or cloth. For a fragrant impact, add a squeeze of lemon or a few drops of your favourite essential oil to the recipe. In this solution, mild dish soap can be used in place of vinegar. You may also combine them all to make an even more powerful cleanser. As is always the case, the water-to-cleaning-agent ratio determines how concentrated and effective the cleaner is. In all circumstances, the water should be warm to hot, and the mix should be changed on a regular basis in order to help you properly clean your floor.
- Mop – Yes, it is possible to mop your rubber flooring. Whenever spills or stains occur, grab a mop, dip it in the cleaning solution mentioned above and begin cleaning. To make the motion easier and smoother, choose a mop that does not make a lot of surface contact like a microfiber tube one, instead of a flat mop. You don’t need to worry about making your rubber flooring too wet since unlike most other flooring materials, rubber does not sustain water damage.
- Scrub stubborn stains – If you have a deeply embedded stain, use a strong cleaning solution and a hand brush to apply extra pressure to the floor. You can scrub vigorously. Make sure you don’t press so hard that the bristles of the brush scratch the floor. A nylon scrub brush would work great. If once your floor is dry the stain remains, repeat this step until it is completely gone.
- For urine stains – Urine can be a particular issue for rubber flooring, generating set-in stains that are impossible to remove using traditional procedures. In such a case, apply a generous amount of white toothpaste to the affected area. Allow it to dry for 10 to 15 minutes before washing it off with warm, clean water. This can be repeated multiple times until the stain is gone. We propose Clorox Commercial Solutions Urine Remover if you prefer using commercial cleaning solutions.
- Condition your floor and buff to a shine – A rubber floor conditioner can be applied to the floor’s surface by hand or with professional-grade buffing equipment. If you use a machine, be sure it does not exceed 350 revolutions per minute otherwise you risk ruining the floor. Periodic conditioning will help to restore the beautiful shine that your rubber floor once had. A less expensive approach is to put 1 cup of fabric softener into a gallon of water and mop the floor with it. This should assist to restore part of the original glow if done on a regular basis.
Extra tip: You can always turn to a professional cleaning service if you struggle with maintaining your rubber flooring.
Things to keep in mind:
- Rubber, unlike certain other flooring materials, is not impacted by moisture while cleaning and mopping. Allow the floor to air dry to achieve a naturally streak-free surface.
- If your rubber flooring is laid over a plywood subfloor, any standing water on the joints between the tiles may leak, causing the underlying wood to mould or decay over time. This can be avoided by installing a vapour barrier underlayment during the installation process.
- Dirt and small debris tracked in by shoes and boots or blown in through windows and air ducts are the most common maintenance issue with a rubber floor. Rugs at the entry and exit of each room can help absorb some of it, but dirt is abrasive and, if not cleaned, will wear down the finish of your floor over time. Sweeping on a regular basis will keep your floors looking nice for years to come.